

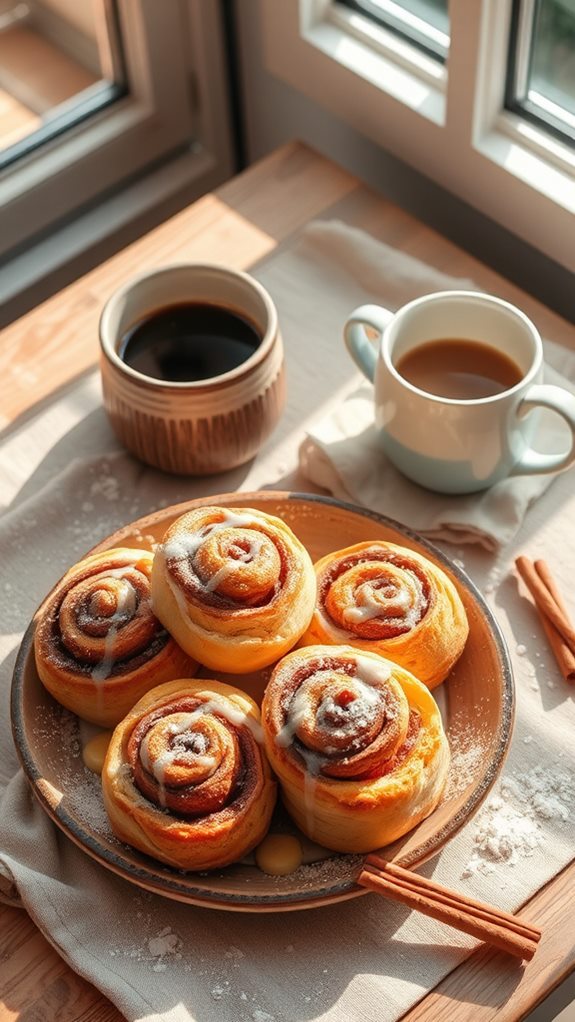
You're about to whip up some of the easiest, gooey cinnamon rolls that'll make your breakfast or brunch irresistibly special! With just five ingredients—refrigerator biscuits, melted butter, brown sugar, cinnamon, and maybe some powdered sugar for a drizzle—you'll be in sweet, sweet heaven. Mix the butter, sugar, and cinnamon for a heavenly filling, coat the biscuit pieces, and bake them until golden brown. The smell will be pure magic! Let them cool a bit, glaze them if you want, and enjoy. These warm, melty bites bring comfort and joy, just like a cozy hug. Stick around to investigate more tips and tricks!
Main Points
- Use refrigerator biscuits for a quick and fluffy base in your cinnamon rolls.
- Combine melted butter, brown sugar, and cinnamon for a gooey filling.
- Cut biscuits into quarters and coat thoroughly to ensure even flavor.
- Bake at 350°F for 20-25 minutes until golden brown and puffed.
- Drizzle with an optional powdered sugar glaze for extra sweetness before serving.
Recipe: Five-Ingredient Cinnamon Rolls
Indulge in the joy of homemade cinnamon rolls with this quick and easy five-ingredient recipe. Perfect for a leisurely breakfast or brunch, these rolls deliver the warmth and comfort of traditional cinnamon rolls without the complicated steps.
With just a can of refrigerator biscuits, you can whip up fluffy, gooey treats that are sure to please everyone at the table. The delightful aroma of cinnamon and sugar wafting through your home is an added bonus, setting the perfect mood for a cozy morning.
These cinnamon rolls aren't only simple to make but also incredibly versatile. You can easily adjust the sweetness and spice levels to suit your personal preference. Whether you enjoy them plain, drizzled with a glaze, or topped with a cream cheese frosting, this recipe allows you to create the perfect sweet treat to complement your morning coffee or tea.
Ingredients:
- 1 can of refrigerator biscuits
- 1/2 cup of melted butter
- 1/2 cup of brown sugar
- 1 tablespoon of cinnamon
- 1/4 cup of powdered sugar (optional for glazing)
To prepare the cinnamon rolls, begin by preheating your oven to 350°F (175°C). In a mixing bowl, combine the melted butter, brown sugar, and cinnamon, stirring until the mixture is well blended.
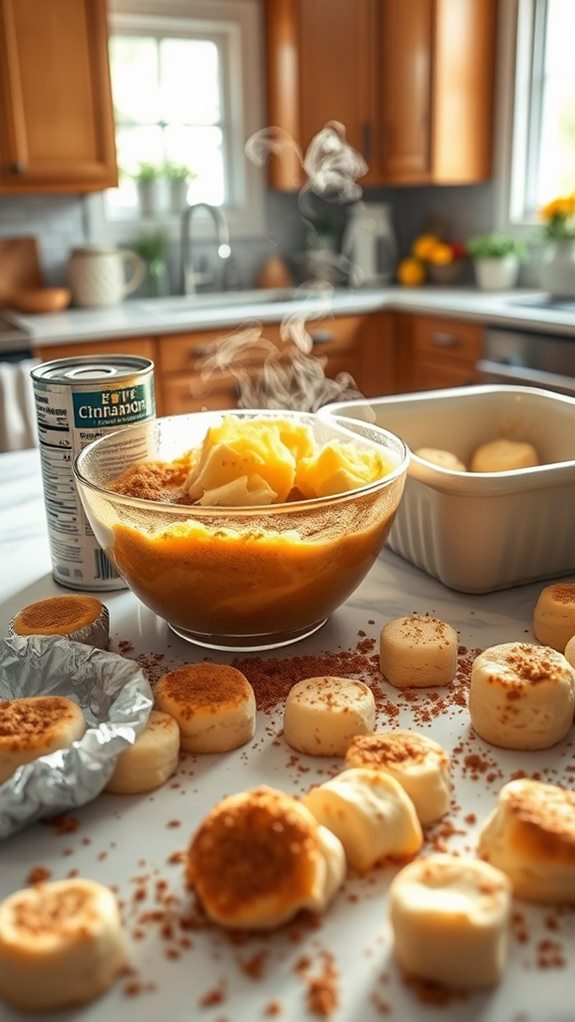
Next, open the can of refrigerator biscuits and cut each biscuit into quarters. Toss the biscuit pieces into the cinnamon mixture until they're thoroughly coated. Arrange the coated pieces in a greased baking dish, ensuring they're spread out evenly.
Bake in the preheated oven for 20-25 minutes or until the top is golden brown. Once baked, allow to cool slightly before drizzling with a powdered sugar glaze, made by mixing the powdered sugar with a little water to reach drizzling consistency.
For the best results, consider these extra tips: Feel free to experiment with the amount of brown sugar and cinnamon to find your ideal balance of sweetness and spice.
Make sure each biscuit piece is generously coated in the butter mixture to improve the gooey texture. If you prefer a crunchier top, extend the baking time slightly, but keep a close eye on the rolls to prevent burning.
Enjoy these cinnamon rolls warm for a delightful treat any time of day!
Cooking Steps
Let's get those cinnamon rolls rolling! First, you'll preheat your oven to 350°F, which is the perfect starting point for creating that warm, gooey goodness.
Then, mix together the melted butter, brown sugar, and cinnamon while you cut the biscuits into bite-sized pieces—trust me, your taste buds will thank you!
Step 1. Preheat Oven to 350°F

Preheating your oven to 350°F (175°C) sets the stage for baking those delicious cinnamon rolls.
It's like turning on the excitement before the big show! While your oven warms up, you're getting closer to that heavenly smell filling your kitchen.
Trust me, the aroma will have everyone buzzing with anticipation.
Now, while the oven is doing its thing, take a moment to gather your ingredients.
Make sure you've got everything handy so you won't have to run around like a chicken with its head cut off later.
Once the oven reaches that perfect temperature, it'll be time to pop your cinnamon rolls in, and they'll need that precise heat to transform into fluffy, gooey goodness.
Step 2. Mix Butter, Sugar, and Cinnamon
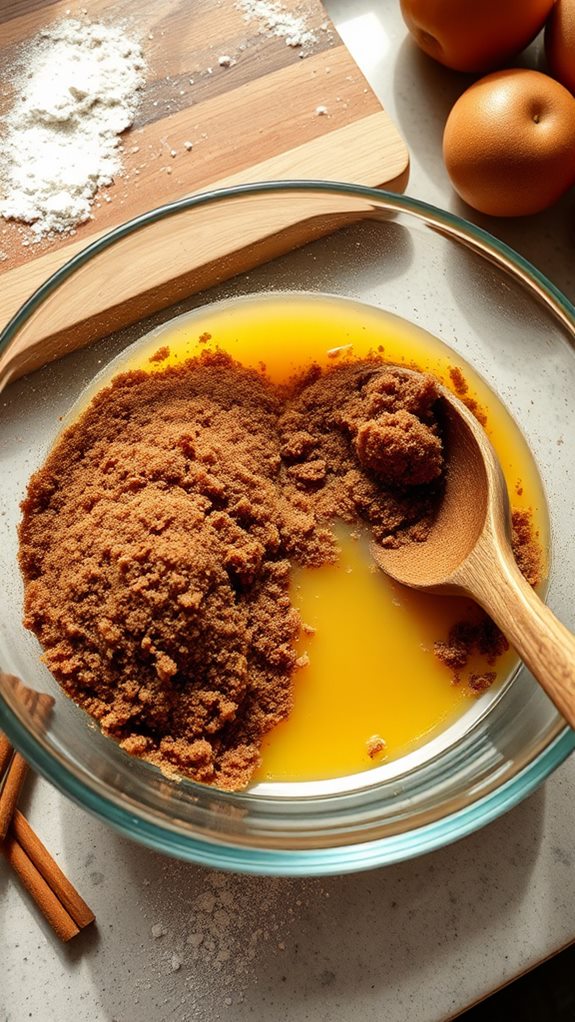
To create the delectable filling for your cinnamon rolls, start by combining the melted butter, brown sugar, and cinnamon in a bowl. Make sure you've melted that butter nice and good; no one wants clumps of cold butter ruining their gooey masterpiece!
As you mix everything together, you'll notice that sweet and spicy aroma fill the air—trust me, it's pretty magical.
Once you've got a smooth and creamy mixture, take a moment to admire your work. You're really cooking up something special here!
Now, you can play around with the measurements a bit if you like things sweeter or spicier. Don't be shy! Add an extra sprinkle of cinnamon or a bit more brown sugar if you're feeling adventurous.
The key thing is to make sure everything's well mixed so every piece of biscuit gets its fair share of that sweet goodness. This mix is what'll turn your ordinary rolls into something extraordinary.
Step 3. Cut and Coat Biscuits

Start by opening the can of refrigerator biscuits and cutting each biscuit into quarters. It's like a little biscuit puzzle!
Once you've got those quarters, toss them into the delicious cinnamon mixture you made earlier. Make sure every piece gets a good coat—don't leave any biscuit behind!
As you toss the pieces, get a little enthusiastic! It's easy to get carried away and feel like a chef on a cooking show. You want them all to be fully covered in that gooey goodness of melted butter, brown sugar, and cinnamon. Just imagine how fantastic they're going to taste!
Now, grab a greased baking dish and start arranging those cinnamon-coated biscuit pieces in there. Stack 'em up, but don't squish them too tightly. They need space to puff up and turn into golden little rolls.
Once that's done, you're ready to pop them into the oven.
Just think, in no time, you'll have a warm, gooey treat to share (or keep all to yourself, no judgment here!). So, lace up those oven mitts and get ready for the next step!
Step 4. Bake Until Golden Brown
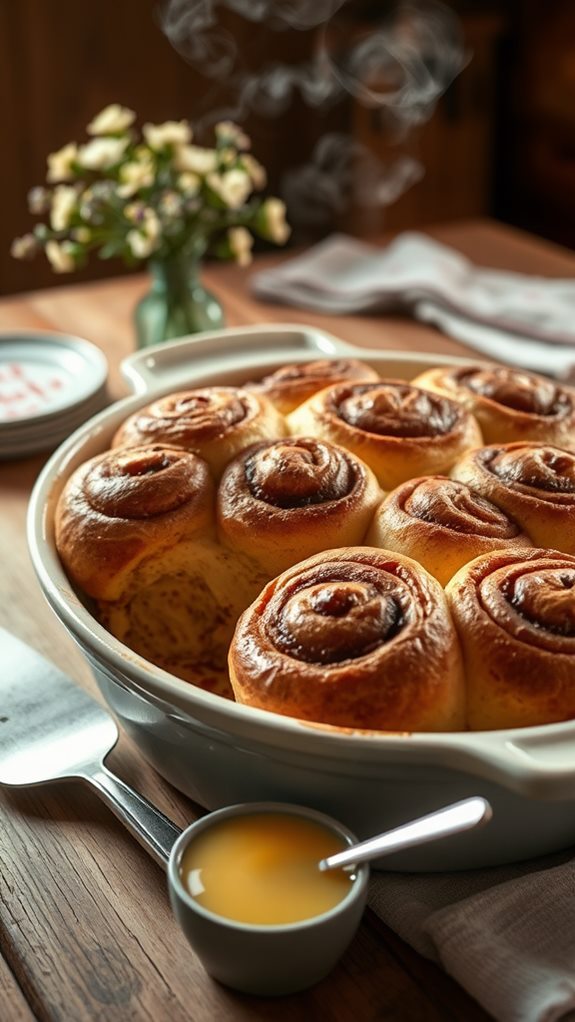
Once your biscuit pieces are arranged in the greased baking dish, place them in the preheated oven and let them bake for 20-25 minutes. As they start to heat up, you'll notice that incredible smell wafting through your kitchen—it's like a warm hug!
Keep an eye on them, because you want those rolls to get perfectly golden brown. While they're baking, you might hear a bit of sizzling. That's the butter doing its delicious thing, soaking into the biscuits. If you're feeling adventurous, you can also sneak a peek about halfway through. Just open the oven, but be careful of the steam!
Once those cinnamon rolls are puffed up and have that irresistible golden color, it's time to pull them out. Let them cool for a minute—you don't want to burn your tongue on that gooey goodness.
This is the moment you've been waiting for! Just picture yourself biting into that warm, soft roll, dripping with sweetness. There's nothing quite like homemade cinnamon rolls, right? So go ahead, grab a plate and get ready for the sweet magic that's about to unfold!
Step 5. Cool Slightly Before Serving
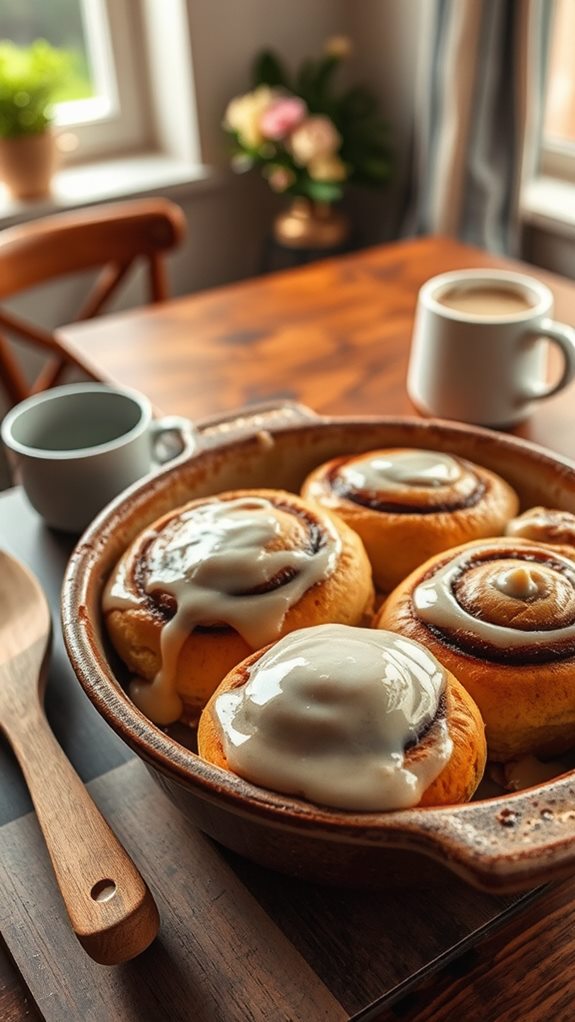
After those fragrant cinnamon rolls have baked to perfection, let them cool for about 5 to 10 minutes in the baking dish. I know, it's tough to resist diving in right away, but trust me, you don't want to burn your mouth on that gooey goodness! This brief cooling period allows all those flavors and textures to settle.
While they cool, you can catch your breath and maybe do a little happy dance—because you just made cinnamon rolls from scratch!
After the wait, you'll notice that they're easier to handle, and it keeps the frosting from melting away if you decide to add some on top.
Now, if you're feeling fancy, grab that powdered sugar and mix it with a bit of water for a quick glaze. Drizzle it over your rolls, and voilà! You've got a delicious breakfast or brunch treat that looks as good as it smells.
History

Cinnamon rolls have a history that traces back several centuries, with roots reaching into the kitchens of Northern Europe. Imagine cozy farmhouse mornings where the sweet smell of cinnamon wafted through the air, warming hearts and bellies.
It's believed that these delightful treats originated in Sweden and Germany, where they were enjoyed for breakfast or as a sweet indulgence.
As time rolled on, the beloved cinnamon roll made its way across the ocean to America, where it became a staple for brunches and family gatherings. People began experimenting with different recipes, mixing in ingredients like nuts, raisins, and even cream cheese. Who wouldn't want to enhance a gooey roll with a tasty twist?
Throughout the years, cinnamon rolls have evolved but remained a favorite in kitchens worldwide. They've even made their way into famous coffee shops, tempting you every time you grab your morning caffeine fix.
Isn't it fascinating that such a simple pastry holds a rich history? So next time you bite into a warm cinnamon roll, remember, you're not just enjoying a treat; you're savoring centuries of delicious tradition!
Final Thoughts
As you savor that warm cinnamon roll, it's worth reflecting on how timeless this treat is.
Seriously, who doesn't love diving into that gooey goodness that makes breakfast feel like a celebration? Whether you whip these up on a lazy Sunday or surprise a friend at brunch, these rolls bring smiles all around.
And hey, the best part? You can mix and match ingredients based on your mood! Feel like a little extra sweetness? Drizzle on that glaze or toss in some nuts for crunch.
Want a cozy, simple bite? Stick to the classic recipe, and you're golden.
But let's be real; it's hard to beat the aroma of freshly baked cinnamon rolls filling your house. It's that happy scent that makes everyone want to gather in the kitchen.
Baking brings people together, doesn't it?
Conclusion
So, there you have it—your very own five-ingredient cinnamon rolls that are super easy to whip up! Picture the smiles on your family's faces as they indulge in these gooey, sweet treats. You've got the power to customize them, too! Add a drizzle of icing or some nuts if you're feeling fancy. Now that you know how to bake these delightful rolls, your mornings just got a whole lot sweeter. Get ready to roll—literally!