

If you're looking to wow your friends at your next party, red velvet cake is the way to go! With its vibrant red color, fluffy texture, and just a hint of cocoa, it's like a party in your mouth. You'll need basic ingredients like flour, sugar, cocoa powder, oil, and buttermilk. Mix 'em up, bake for 25-30 minutes, and don't forget the creamy frosting made of cream cheese and butter – it's the icing on the cake! Seriously, who can resist that? Stick around, and we'll spill even more tricks to make your baking adventure unforgettable!
Main Points
- Red Velvet Cake features a moist crumb with a subtle cocoa flavor, making it a delightful dessert for festive occasions.
- The vibrant red color and fluffy texture create an eye-catching presentation, perfect for celebrations like birthdays and anniversaries.
- Easy-to-follow instructions help beginner bakers create a delicious Red Velvet Cake with minimal effort and time.
- Cream cheese or buttercream frosting enhances the cake's richness and allows for creative decorating options.
- Originating in luxury hotels, the cake holds cultural significance, solidifying its place in special celebrations and gatherings.
Recipe: Five-Ingredient Cake Instructions
Red Velvet Cake is a beloved classic that stands out not only for its vibrant color but also for its tender and moist crumb. This simplified version of the cake allows anyone, from beginners to seasoned bakers, to enjoy the rich flavors with minimal effort. Made with just five basic ingredients, this recipe guarantees a delightful experience in both flavor and presentation, perfect for birthdays, anniversaries, or any celebration.
Baking can be a rewarding experience, and with this easy red velvet cake recipe, you'll produce a standout dessert that looks as good as it tastes. The combination of the subtle cocoa flavor with a touch of sweetness sets the stage for a memorable treat. Plus, with straightforward instructions, you'll find yourself in and out of the kitchen in no time, ready to impress your guests or indulge yourself!
Ingredients:
- 1 ½ cups all-purpose flour
- 1 cup granulated sugar
- 1 teaspoon cocoa powder
- 1 cup vegetable oil
- 1 cup buttermilk
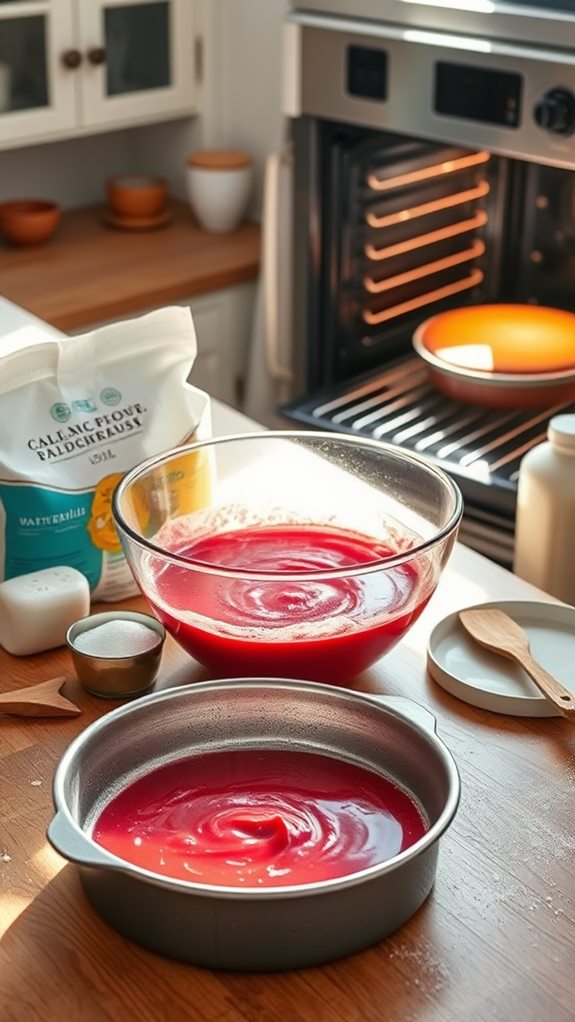
To prepare your red velvet cake, start by preheating your oven to 350°F (175°C) and greasing a 9-inch round cake pan. In a large mixing bowl, combine the all-purpose flour, granulated sugar, and cocoa powder, whisking until everything is well mixed.
Then, add in the vegetable oil and buttermilk, stirring thoroughly until the batter is smooth and lump-free. Pour the batter into the prepared cake pan, and bake for 25-30 minutes, or until a toothpick inserted into the center comes out clean.
Once baked, allow the cake to cool in the pan for a few minutes before transferring it to a wire rack to cool completely.
As you bake this delicious cake, consider a few extra tips to raise your creation. If you want to boost the red color of the cake, feel free to add a few drops of food coloring, but use it sparingly to achieve the desired hue.
For a lovely finishing touch, whip up a quick cream cheese frosting by mixing cream cheese with powdered sugar and a hint of vanilla extract. Remember to check your cake for doneness a few minutes before the timer goes off to confirm it doesn't overbake.
Enjoy your baking adventure and feel free to get creative with decorations and toppings!
Cooking Steps
Let's get into the cooking steps for your red velvet cake!
First, you'll want to mix those dry ingredients really well because nobody wants clumps of flour in their slice, right?
Once you've got that down, slowly add in the wet stuff, bake it up, and you'll soon have a delicious treat that's just begging for some creamy frosting on top!
Step 1. Mix Dry Ingredients Thoroughly

To achieve the perfect texture and flavor in your red velvet cake, it's essential to mix the dry ingredients thoroughly. Start by grabbing a large mixing bowl and toss in your all-purpose flour, granulated sugar, and cocoa powder.
Now, here's the fun part: use a whisk to blend everything together! It's like a little workout for your arm, and you want to make certain those ingredients are evenly distributed. If you skip this step, your cake might end up with pockets of sweetness or bitterness—yikes!
After a few minutes of whisking, you should have a nicely combined mixture that looks light and fluffy. This step is super important because the air you're incorporating will help your cake rise beautifully.
Plus, it guarantees that the cocoa powder doesn't turn into a clump in your cake batter, which would ruin its stunning red color and taste. So go ahead and get that whisk moving!
Once you're confident that everything's mixed well, you're ready to move on to the next steps. Trust me; it's a small effort that makes a big difference in your cake's yumminess!
Step 2. Add Wet Ingredients Slowly

When it comes to incorporating the wet ingredients, doing so slowly is key for achieving a smooth and cohesive batter. You'll wanna take your time with this step; rushing it can create clumps that'll turn your dreamy cake into a sad mess. Start by pouring in the vegetable oil, followed by the buttermilk. As you add these ingredients, mix gently with a spatula or whisk. You'll notice the magic happen as everything starts blending together!
Here's a quick look at why slow and steady wins the race:
| Ingredient | Reason to Add Slowly |
|---|---|
| Vegetable Oil | Helps create a silky texture |
| Buttermilk | Guarantees an even distribution |
| All Mixture | Avoids clumps and guarantees smoothness |
Feel free to dance a little or sing while you mix—baking should be fun! Remember, the goal is to have a luscious batter that flows like a river, not one that looks like gravel. So be patient, enjoy the process, and you'll have a delightful red velvet cake ready to bake in no time!
Step 3. Bake for 25-30 Minutes

The delicious aroma of the red velvet cake wafts through your kitchen as it bakes in the oven. It's like a warm hug, letting you know that something special is happening.
While you're waiting, you might find yourself glancing at the clock, enthusiastic for those next moments to pass. Set your timer for 25 to 30 minutes, and don't forget to check the cake's progress!
You'll want to make sure the magic is happening inside that pan. When the timer dings, grab a toothpick and poke it gently into the center of the cake. If it comes out clean, congratulations! You've nailed it!
If not, don't worry—just give it a few more minutes and check again. After all, we all want that perfect bake.
As the cake cools, you can think about how you're going to decorate it. Maybe you'll whip up some cream cheese frosting to top it off?
Or maybe just a sprinkle of powdered sugar to keep it simple? Each whiff of the cake reminds you: soon, you'll dig in, and trust me, it'll be worth the wait!
Step 4. Cool on Wire Rack

Once the cake has baked and you've tested it for doneness, it's essential to let it cool properly. Carefully remove the cake from the oven and let it sit in the pan for about 10 minutes. This little waiting game helps it firm up just enough so it won't fall apart when you flip it out.
Now comes the fun part! Gently run a knife around the edges of the pan to help loosen any stubborn spots, then flip the cake onto a wire rack. Be brave, and don't panic—this is the shift where magic happens.
As it cools on the rack, air circulates around it, preventing a soggy bottom, which is a total bummer.
Let the cake cool completely, which usually takes about an hour. I know the aroma is tempting, but patience is key! If you don't, your frosting might melt into a gooey mess, and trust me, nobody wants that.
Once it's cool and ready, it'll be the perfect blank canvas for frosting. So grab a good book or dance around the kitchen—just don't forget about your cake!
Step 5. Frost With Cream Cheese

Now that your cake has cooled completely and is ready for the next step, it's time to frost it with a delightful cream cheese frosting. Trust me, this part is super fun and totally worth it!
Grab a mixing bowl and combine 8 ounces of softened cream cheese with ½ cup of unsalted butter. Whip it together until it's nice and creamy. Then, slowly add about 4 cups of powdered sugar and a splash of vanilla extract. Beat it until it's all smooth and fluffy!
Now, here comes the fun part! Use a spatula or a knife to spread that creamy frosting all over the top and sides of your beautiful red velvet cake. Don't stress if it gets a little messy—that's part of the charm! If you want, you can even sprinkle some extra cocoa powder or colorful sprinkles on top.
Once you're done, step back and admire your creation. You've put in the work, and now it's ready for the spotlight! Your friends and family will be impressed, and trust me, they won't be able to resist a slice. Enjoy your masterpiece!
History

Red Velvet Cake has a fascinating history that dates back to the early 20th century. You might be surprised to realize that its origins are a bit mysterious! Some say it started in the kitchens of luxury hotels, where it was served as a special treat. People loved that unique red color, which was different from the usual chocolate or vanilla cakes. Isn't that cool?
In fact, during World War II, some bakers experimented with the ingredients due to shortages. They discovered that using cocoa powder could create a reddish tint when combined with acidic ingredients like buttermilk or vinegar. This gave rise to the cake we recognize today!
It wasn't until the 1980s that it climbed to fame, thanks to food coloring and the popularity of southern cooking.
Now, red velvet's got a cozy spot in the hearts of cake lovers, especially for special celebrations. You'll often find it at birthday parties, weddings, and even holidays!
Final Thoughts

As you savor a slice of red velvet cake, you're not just enjoying a delicious dessert; you're also partaking in a rich culinary tradition. This dessert not only looks fabulous with its vibrant color, but it also tastes incredible with that perfect balance of sweetness and a hint of cocoa.
Who knew baking could be this easy and rewarding?
Now that you've mastered this simple recipe, think about the joy it'll bring to your friends and family at your next gathering. Picture them digging into that fluffy cake, faces lighting up with happiness.
Plus, you can easily get creative! Experiment a little—try different frostings, sprinkles, or even fun decorations. Become the baking superstar you were meant to be!
Conclusion
With just five simple ingredients and a little bit of love, you can whip up a stunning red velvet cake that'll wow everyone at your next get-together. It's soft, sweet, and totally eye-catching—perfect for any occasion. Don't forget to snap a pic before it disappears; trust me, you'll want to remember this moment! Happy baking, and may your cake turn out as fabulous as you are! Enjoy every delicious bite!